
Hardening Your Windows Environment: Strategies, Tools, and Best Practices
In an era where cyber threats grow increasingly sophisticated, hardening your Windows environment has never been more essential. Whether you’re an individual user or a business leader, adopting robust security measures can mean the difference between a secure system and a costly breach. This article provides a comprehensive guide to hardening your Windows setup, focusing on practical steps, tools, and strategies to make your systems more resilient against attacks.
This guide will also feature ThreatLocker as a primary security tool and reference Anytime Computer Services for IT support solutions, ensuring that both novice users and seasoned professionals can elevate their cybersecurity game.

1. Understanding the Threat Landscape for Windows Systems
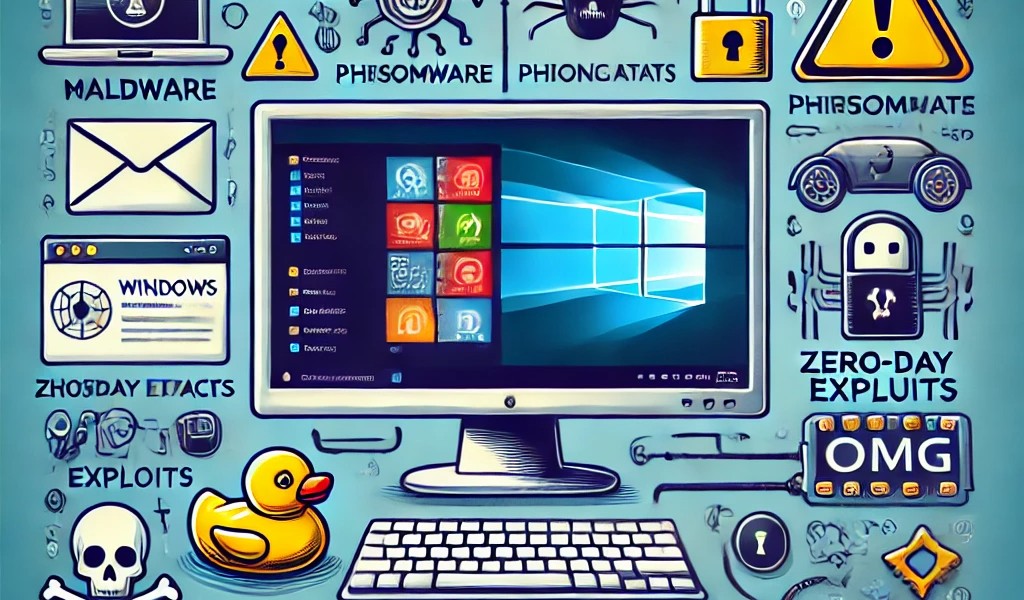
Before diving into hardening strategies, it’s critical to understand the types of threats your Windows environment faces. Windows is the most widely used operating system, making it a prime target for various types of attacks, such as:
- Malware and Ransomware: Malicious software that can encrypt or steal your data.
- Phishing Attacks: Tactics used by attackers to trick users into divulging sensitive information.
- Zero-Day Exploits: Vulnerabilities that are unknown to the vendor and exploited by attackers.
- Physical Attacks with USB Devices: Attacks using devices like Rubber Ducky, OMG Cables, or Flipper to inject malicious scripts.
By understanding these threats, you’re better equipped to defend against them. At Anytime Computer Services, we specialize in identifying these vulnerabilities and implementing strategies to safeguard your systems. You can learn more about our cybersecurity solutions here.
2. Implementing a Zero-Trust Security Model
What is Zero-Trust?
A Zero-Trust security model assumes that no entity, internal or external, is inherently trustworthy. Access to data and systems is restricted and only allowed on a need-to-know basis. This principle forms the foundation of modern cybersecurity strategies.
How to Implement Zero-Trust on Windows

- Network Segmentation: Divide your network into smaller segments to limit the spread of attacks if a breach occurs.
- Multi-Factor Authentication (MFA): Secure all accounts with MFA to prevent unauthorized access.
- Privilege Management: Grant the least amount of privileges necessary for tasks.
Network Segmentation
Divide your network into smaller segments to limit the spread of attacks if a breach occurs. Network segmentation involves splitting your network into multiple smaller sub-networks, or “segments,” each with its own security controls. This strategy helps contain potential threats and prevents attackers from moving freely across your entire network if they gain access to one segment.
Practical Tips for Network Segmentation:
- Identify Critical Assets: Start by identifying the most sensitive data and systems within your organization. Place these critical assets in separate segments with the highest level of security.
- Use VLANs (Virtual Local Area Networks): VLANs can be used to logically separate devices within the same physical network, creating secure zones without the need for additional hardware.
- Implement Access Control Lists (ACLs): Use ACLs to restrict traffic between segments based on predefined security rules. This helps ensure that only authorized devices and users can communicate across segments.
- Create a DMZ (Demilitarized Zone): For publicly accessible services (e.g., web servers), create a DMZ that isolates them from your internal network. This layer adds an extra barrier against external attacks.
Tools to Consider: Firewalls with support for segmentation, such as those from Cisco or Palo Alto Networks, can help enforce segmentation policies effectively.
Multi-Factor Authentication (MFA)
Secure all accounts with MFA to prevent unauthorized access. Multi-Factor Authentication adds an extra layer of security by requiring users to provide more than one piece of evidence to verify their identity. Even if a password is compromised, MFA significantly reduces the risk of unauthorized access.
Practical Tips for Implementing MFA:
- Use a Combination of Factors: The three common factors are:
- Something you know: Like a password or PIN.
- Something you have: Like a smartphone or hardware token.
- Something you are: Biometric verification, such as fingerprints or facial recognition.
- Enable MFA on High-Value Accounts First: Start by enabling MFA on administrator accounts, sensitive data access points, and email accounts.
- Consider User-Friendly Options: Implementing MFA with smartphone apps like Google Authenticator, Microsoft Authenticator, or Duo Security can be more convenient for users and increases adoption rates.
- Back-Up Options: Provide users with alternative methods, like backup codes or secondary devices, in case their primary MFA method is unavailable.
Best Practice: Enable MFA across all accounts, even for non-critical applications, as attackers often target the weakest link in a network.
Privilege Management
Grant the least amount of privileges necessary for tasks. Privilege management ensures that users only have the access they need to perform their job functions. Reducing user permissions helps limit the damage in case of a compromised account.
Practical Tips for Privilege Management:
- Adopt the Principle of Least Privilege (PoLP): Always configure user permissions to the lowest level necessary to perform their specific roles. Avoid giving administrative rights unless absolutely required.
- Use Role-Based Access Control (RBAC): Implement RBAC to assign permissions based on user roles within the organization. Create roles with predefined access levels, such as ‘Administrator,’ ‘Manager,’ or ‘Staff,’ and assign users accordingly.
- Regularly Review Permissions: Periodically review all user accounts and their permissions to ensure that access levels are appropriate. Remove or adjust permissions for users who have changed roles or no longer require access.
- Monitor Elevated Accounts: Closely monitor accounts with elevated privileges, such as system administrators or database managers, for unusual activity or unauthorized changes.
Tools to Consider: Solutions like ThreatLocker and Microsoft’s Active Directory provide robust privilege management features, allowing you to easily control user permissions and limit access to critical systems.
ThreatLocker is a key player in the Zero-Trust approach, providing tools like Application Control and Ringfencing to ensure that applications only perform functions that are explicitly authorized.
For personalized guidance on setting up Zero-Trust security, reach out to our experts at Anytime Computer Services. We offer tailored IT support to help businesses transition to a more secure infrastructure. Check out our services here.
3. Configuring Windows Security Features

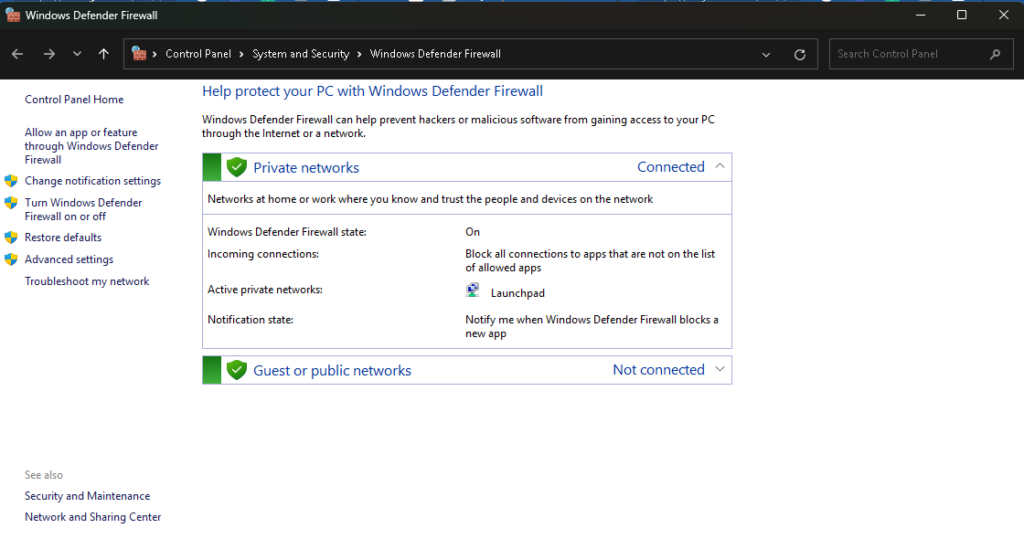
Windows Defender Firewall
The built-in Windows Defender Firewall can provide a robust first line of defense if properly configured. To enhance your firewall security:
- Enable Default Blocking: Block all incoming and outgoing connections unless explicitly allowed.
- Define Specific Rules: Create rules that limit network access to only trusted applications and services.
Enable Default Blocking
Block all incoming and outgoing connections unless explicitly allowed. Default blocking is a proactive approach to firewall and network security where you deny all traffic by default and only allow traffic that meets specific criteria. This strategy significantly reduces the risk of unauthorized access by limiting the number of open ports and vulnerable services.
Practical Tips for Implementing Default Blocking:
- Set Up Default-Deny Policies: Configure your firewall to block all inbound and outbound traffic by default. This can be done by setting the default rule to “deny all” or “block all” in your firewall settings.
- Whitelist Essential Services: Once default blocking is enabled, create a whitelist of specific applications, services, and IP addresses that are critical to your business operations. Allow only the traffic that is necessary for these services to function.
- Review Logs Regularly: Monitor your firewall logs to identify any legitimate traffic that may be inadvertently blocked by your default rules. Adjust your whitelist accordingly to ensure smooth operation while maintaining a high level of security.
- Test Your Configuration: After implementing default blocking, test your network and applications to ensure that all critical services are functioning properly. Conduct regular audits to ensure that no unnecessary traffic is slipping through the firewall.
Best Practice: Use a layered approach to security by combining default blocking with other security measures like Intrusion Detection Systems (IDS) and Intrusion Prevention Systems (IPS) for maximum protection.
Define Specific Rules
Create rules that limit network access to only trusted applications and services. Defining specific rules for your firewall and network helps control which types of traffic are allowed in or out of your system, ensuring that only authorized connections can be established.
Practical Tips for Creating Specific Firewall Rules:
- Use IP Address Filtering: Create rules that allow traffic only from specific IP addresses or IP address ranges. This method ensures that only trusted networks and devices can access your system.
- Specify Ports and Protocols: Limit access to specific ports and protocols required by your applications. For example, allow only HTTP (port 80) and HTTPS (port 443) traffic for web servers, while blocking other potentially risky ports.
- Enable Application Control: Use application-aware firewalls to create rules based on specific applications rather than just ports and IPs. This method is more secure as it ensures that only authorized applications can use network resources.
- Implement Time-Based Rules: Define time-based access rules to allow or block traffic at specific times. For instance, you might allow remote access only during business hours to reduce the risk of unauthorized access during off-hours.
- Regularly Update and Optimize Rules: Periodically review your firewall rules to remove outdated or unnecessary entries. This practice keeps your ruleset lean and reduces potential attack vectors.
Tools to Consider: Solutions like ThreatLocker’s Firewall Control provide an intuitive way to manage your rules by allowing you to easily set up granular policies that restrict application behavior and communication.
Best Practice: Continuously monitor the effectiveness of your firewall rules and refine them based on evolving threats and changing business needs.
Using ThreatLocker’s Firewall Control can simplify the process of configuring these settings, providing a centralized way to manage and enforce firewall rules.
Windows Defender Antivirus
Though many users turn to third-party antivirus solutions, Windows Defender Antivirus has proven to be a powerful tool when properly utilized. Here’s how to make the most of it:
- Enable Real-Time Protection: This feature continuously scans files and applications to detect and neutralize threats.
- Turn on Controlled Folder Access: This setting helps protect sensitive data by limiting access to critical folders.
Enable Real-Time Protection
This feature continuously scans files and applications to detect and neutralize threats. Real-time protection is a vital component of your security setup, designed to catch and block malware or other malicious activity the moment it occurs. This proactive approach helps ensure that threats are neutralized before they can cause any damage to your system.
Practical Tips for Enabling Real-Time Protection:
- Enable Real-Time Scanning in Your Antivirus Software: Most antivirus solutions, including Windows Defender, have real-time protection enabled by default. Double-check your settings to ensure this feature is activated and functioning properly.
- Keep Your Antivirus Software Updated: Real-time protection is only as effective as its threat database. Regularly update your antivirus software to ensure it can detect the latest malware and virus signatures.
- Schedule Regular Scans: While real-time protection is essential, it’s also a good idea to schedule full system scans at regular intervals. This provides a more thorough check of your system and ensures that no hidden threats go unnoticed.
- Monitor System Performance: Be mindful that enabling real-time protection can sometimes impact system performance. If you notice slowdowns, optimize your settings to balance security with performance, focusing on the most vulnerable areas.
- Whitelist Trusted Applications: To reduce false positives and improve system performance, whitelist any known and trusted applications. This ensures that legitimate software isn’t flagged as a potential threat by your real-time protection.
Tools to Consider: Windows Defender and third-party solutions like Bitdefender or Malwarebytes offer robust real-time protection features that can be customized based on your needs.
Turn on Controlled Folder Access
This setting helps protect sensitive data by limiting access to critical folders. Controlled Folder Access is a powerful feature that helps safeguard important files and directories from ransomware and unauthorized changes by blocking untrusted applications from accessing or modifying them.
Practical Tips for Implementing Controlled Folder Access:
- Enable Controlled Folder Access in Windows Security: Go to Windows Security > Virus & Threat Protection > Ransomware Protection, and turn on Controlled Folder Access. This will protect your files from ransomware attacks and other malicious software.
- Add Protected Folders: By default, Windows protects standard user folders like Documents, Pictures, and Videos. To increase security, add other folders containing sensitive data that need protection.
- Whitelist Trusted Applications: Sometimes, legitimate applications might be blocked by Controlled Folder Access. Add these trusted applications to the “Allow an app through Controlled Folder Access” list to ensure they can access protected folders without compromising security.
- Use Group Policy for Enterprise Management: If you’re managing multiple systems, use Group Policy settings to enforce Controlled Folder Access across all machines in your organization. This approach ensures a consistent security policy for all users.
- Monitor Blocked Activities: Regularly check the Controlled Folder Access logs in Windows Security to review any unauthorized attempts to access protected folders. This helps you identify potential threats or misconfigurations quickly.
Tools to Consider: Solutions like ThreatLocker also provide advanced ransomware protection features that can complement or enhance the functionality of Controlled Folder Access, offering additional layers of defense for your critical data.
Best Practice: Use Controlled Folder Access in combination with real-time protection and regular data backups to create a multi-layered defense against ransomware and unauthorized data changes.
If you need assistance with setting up or optimizing your antivirus settings, Anytime Computer Services offers comprehensive IT support packages starting at $150 per month. Learn more about our plans here.
BitLocker Drive Encryption
Encrypting your data is crucial in case of theft or unauthorized access. BitLocker allows you to encrypt entire drives with strong encryption algorithms.
- Enable BitLocker: Ensure all sensitive data is stored on encrypted drives.
- Use TPM (Trusted Platform Module): Securely store encryption keys to prevent unauthorized access.
Implementing BitLocker can be a technical challenge, but Anytime Computer Services provides the expertise needed to ensure your data remains secure. Visit our site for support details here.
4. Patch Management and Software Updates

Keeping your Windows environment and its applications up-to-date is a critical aspect of security. Here’s how to stay ahead:
- Automatic Updates: Enable automatic updates for both Windows and third-party software to reduce the risk of vulnerability exploits.
- Third-Party Patch Tools: Use software like Patch My PC to automate updates for non-Microsoft products.
Automatic Updates
Enable automatic updates for both Windows and third-party software to reduce the risk of vulnerability exploits. Automatic updates ensure that your system is always protected against known vulnerabilities by keeping your software up-to-date with the latest security patches and improvements.
Practical Tips for Enabling Automatic Updates:
- Enable Windows Automatic Updates: Go to Settings > Update & Security > Windows Update and ensure that automatic updates are turned on. Set updates to install automatically outside of business hours to minimize disruptions.
- Use Active Hours Feature: Configure Windows Active Hours to specify when you’re most active on your device. This feature prevents your system from rebooting during these times, ensuring updates don’t interrupt your workflow.
- Turn on Automatic Restarts: Enable the option for automatic restarts after updates to ensure your system always runs the latest patches without requiring manual intervention.
- Include Driver Updates: Make sure to allow automatic updates for device drivers, as outdated drivers can lead to compatibility issues or security risks.
- Monitor Update Status: Regularly check the Windows Update history to ensure that updates have been applied correctly and no pending updates remain in the queue.
Best Practice: Combine automatic updates with regular manual checks to verify that all critical patches have been installed, especially for high-risk systems and software.
Third-Party Patch Tools
Use software like Patch My PC to automate updates for non-Microsoft products. While Windows updates are crucial, third-party software often poses a significant security risk if not kept up-to-date. Automated patch tools ensure that your entire software ecosystem remains secure without the need for manual intervention.
Practical Tips for Using Third-Party Patch Tools:
- Choose Reliable Patch Management Software: Select a trusted third-party patch management tool like Patch My PC, Ninite Pro, or Secunia PSI. These tools automate the process of finding, downloading, and installing updates for non-Microsoft applications.
- Set Up Auto-Update Schedules: Configure the patch tool to check for updates and install them during off-peak hours. This reduces the impact on system performance and prevents software disruptions during critical tasks.
- Prioritize Security-Critical Applications: Focus on updating third-party software that is most susceptible to attacks, such as web browsers, PDF readers, and other frequently used applications.
- Test Updates in a Controlled Environment: If you’re managing multiple devices or an enterprise network, test updates in a sandbox environment before deploying them across all systems. This practice helps identify potential compatibility issues before they affect the entire network.
- Regularly Audit Software Inventory: Keep an up-to-date inventory of all installed software and ensure your patch management tool covers each application. This ensures that no vulnerable software goes unpatched.
Tools to Consider: Tools like Patch My PC and Ninite Pro offer user-friendly interfaces and extensive support for a wide range of third-party software, making them ideal for automating updates beyond the Windows ecosystem.
Best Practice: Integrate third-party patch management into your overall IT strategy to ensure comprehensive protection for both Microsoft and non-Microsoft software.
ThreatLocker includes a vulnerability scanning feature that identifies outdated software and potential weaknesses. This tool helps ensure that you are always one step ahead of cyber threats.
5. Enhancing Active Directory Security
For businesses, securing Active Directory (AD) is a vital step in protecting user access and permissions.

Steps to Harden Active Directory:
- Disable Unused Accounts: Regularly audit and disable accounts that are no longer active.
- Strong Password Policies: Enforce policies that require complex passwords and periodic changes.
- Implement Role-Based Access Control (RBAC): Assign permissions based on the user’s role to minimize potential exposure.
Disable Unused Accounts
Regularly audit and disable accounts that are no longer active. Unused accounts pose a significant security risk, as attackers can exploit them to gain unauthorized access to your systems. Disabling or deleting these accounts helps reduce your organization’s attack surface.
Practical Tips for Disabling Unused Accounts:
- Conduct Regular Audits: Schedule periodic audits of all user accounts to identify any that have been inactive for an extended period. Check for accounts belonging to former employees, temporary users, or automated services that are no longer in use.
- Disable Instead of Deleting: Initially, disable unused accounts rather than deleting them. This approach allows you to re-enable the accounts quickly if they are needed again while preventing unauthorized access.
- Set Account Expiration Dates: For temporary accounts, such as those created for contractors or interns, set expiration dates to automatically disable access when the account is no longer required.
- Implement Automated Alerts: Use security tools that can alert you to any inactive accounts or suspicious activity related to dormant accounts. Automated alerts help you respond quickly to potential security issues.
- Enforce Account Lockout Policies: Configure your system to automatically lock out accounts after a predefined number of failed login attempts. This prevents brute-force attacks on unused accounts.
Best Practice: Include account auditing as part of your routine security practices to ensure that all inactive accounts are promptly disabled, reducing the risk of exploitation.
Strong Password Policies
Enforce policies that require complex passwords and periodic changes. Strong password policies are fundamental to securing user accounts and preventing unauthorized access. Ensuring that passwords meet complexity requirements and are changed regularly is critical to account protection.
Practical Tips for Implementing Strong Password Policies:
- Set Minimum Password Length: Enforce a minimum password length of at least 12 characters to make brute-force attacks more difficult.
- Use a Mix of Characters: Require passwords to include a combination of uppercase and lowercase letters, numbers, and special characters to enhance complexity.
- Avoid Dictionary Words: Prevent users from creating passwords that are easily guessable or based on common dictionary words.
- Enable Password Expiration: Set policies that require users to change their passwords at regular intervals, such as every 60 to 90 days, to minimize the risk of compromised credentials.
- Implement Multi-Factor Authentication (MFA): Complement strong passwords with MFA to add an extra layer of security, ensuring that even if a password is compromised, unauthorized access is still prevented.
Tools to Consider: Use password management tools like LastPass or Dashlane to help users generate and store complex passwords securely, reducing the likelihood of weak or reused passwords.
Best Practice: Educate users on the importance of creating strong passwords and the risks associated with password reuse to foster a culture of security awareness within your organization.
Implement Role-Based Access Control (RBAC)
Assign permissions based on the user’s role to minimize potential exposure. Role-Based Access Control (RBAC) limits user access to only the resources necessary for their job, reducing the risk of data breaches and unauthorized actions by limiting access privileges.
Practical Tips for Implementing RBAC:
- Define User Roles Clearly: Start by defining specific roles within your organization, such as ‘Administrator,’ ‘Manager,’ ‘Staff,’ or ‘Guest.’ Each role should have predefined access levels based on job requirements.
- Assign Permissions by Role: Grant permissions to users based on their roles rather than on an individual basis. This ensures that users only have access to the resources necessary to perform their duties.
- Use the Principle of Least Privilege (PoLP): Limit the permissions of each role to the minimum level required for the tasks they need to perform. Avoid granting administrative rights unless absolutely necessary.
- Regularly Review and Update Roles: Periodically review roles and their permissions to ensure they align with current business needs. Remove or adjust permissions for roles that no longer require access to specific resources.
- Audit Role Assignments: Conduct regular audits of role assignments to verify that users have the appropriate level of access for their responsibilities. Ensure that no one has more access than is needed for their role.
Tools to Consider: Tools like Microsoft’s Active Directory and ThreatLocker’s RBAC features can help streamline the implementation of role-based permissions and enforce access control policies across your organization.
Best Practice: Integrate RBAC into your organization’s onboarding and offboarding processes to ensure that new hires receive the correct access from the start and that former employees are immediately removed from all systems upon departure.
Tools like ThreatLocker Ringfencing can be particularly useful in controlling how applications interact within your Active Directory environment, reducing the risk of lateral movement by attackers.
6. Physical Device Security
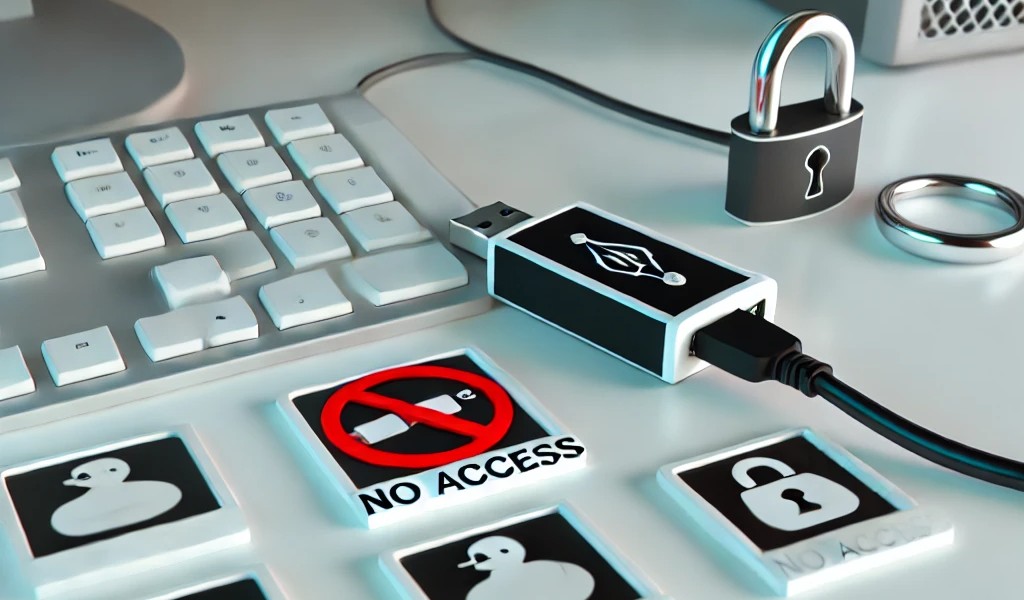
Physical attacks using USB devices like Rubber Ducky or OMG Cables can be extremely dangerous if your system is not properly secured. To mitigate these threats:
- Restrict USB Access: Limit or disable USB ports to prevent unauthorized devices from connecting.
- Device Whitelisting: Use ThreatLocker’s Device Control to create a whitelist of approved devices that are allowed to connect to your systems.
Restrict USB Access
Limit or disable USB ports to prevent unauthorized devices from connecting. Restricting USB access is a crucial security measure to prevent malicious devices like Rubber Ducky or OMG Cables from compromising your system. Controlling USB ports reduces the risk of data theft, malware infection, and unauthorized access to sensitive information.
Practical Tips for Restricting USB Access:
- Disable Unused USB Ports: Physically disable USB ports that are not in use on desktops and laptops. This can be done in the system BIOS or through device manager settings, ensuring that these ports cannot be used to connect unauthorized devices.
- Use USB Port Control Software: Utilize software tools like Endpoint Protector or DeviceLock to manage USB port access on a granular level. These tools allow you to control which devices can connect to the USB ports based on user roles or device types.
- Enable USB Block Policies: In Windows, use Group Policy Editor to create USB block policies. You can disable USB storage devices entirely or allow only specific types of USB devices to connect, like keyboards or mice.
- Encrypt USB Storage Devices: If USB devices must be used, ensure that they are encrypted and protected with strong passwords. This will prevent unauthorized access to data in case the device is lost or stolen.
- Alert Notifications: Set up alerts for any unauthorized attempts to connect a USB device to your systems. This will allow you to respond quickly to potential security breaches.
Best Practice: Combine USB restrictions with network segmentation to create an additional layer of security. This setup ensures that even if a malicious device connects, it cannot move laterally through your network.
Device Whitelisting
Use ThreatLocker’s Device Control to create a whitelist of approved devices that are allowed to connect to your systems. Device whitelisting is a proactive approach that ensures only known and trusted devices can access your network, effectively preventing unauthorized USB drives and other peripheral devices from connecting.
Practical Tips for Implementing Device Whitelisting:
- Create a Comprehensive Whitelist: Begin by identifying all the devices that are necessary for your business operations. Add these devices to the whitelist in ThreatLocker’s Device Control settings, allowing only them to connect to your network.
- Restrict by Device Type: Use ThreatLocker’s tools to limit access based on the type of device, such as storage devices, printers, or external hard drives. This granular control ensures that only the devices necessary for specific tasks can connect.
- Set Role-Based Device Permissions: Implement role-based access control (RBAC) to define which users or departments are allowed to use specific devices. For example, only IT personnel might have permission to use external storage devices.
- Monitor Device Activity: ThreatLocker’s Device Control provides detailed logs of all connected devices and their activities. Regularly review these logs to detect any unauthorized attempts to connect non-whitelisted devices.
- Enforce Encryption on Whitelisted Devices: Ensure that all approved devices are encrypted and password-protected. This adds an extra layer of security, ensuring that even trusted devices cannot be used for data exfiltration if they fall into the wrong hands.
Tools to Consider: ThreatLocker’s Device Control is highly effective in implementing device whitelisting, allowing you to easily manage and monitor which devices can access your systems while blocking all unapproved hardware.
Best Practice: Regularly update your whitelist to account for new devices and remove any that are no longer in use. This continuous maintenance ensures that your list stays current and only includes trusted, essential devices.
For businesses that require help with USB restrictions or setting up device control policies, Anytime Computer Services offers professional support tailored to your specific needs. Learn more about our computer repair and device security solutions here.
7. Monitoring and Logging
Continuous monitoring of your system’s activities can help detect and respond to threats in real time.

Tools for Monitoring and Logging:
- Windows Event Viewer: Utilize Event Viewer to track system logs and identify suspicious activities.
- SIEM Systems: Tools like Splunk or Graylog can provide centralized logging and real-time threat analysis.
Windows Event Viewer
Utilize Event Viewer to track system logs and identify suspicious activities. Windows Event Viewer is a built-in tool that helps you monitor and manage your system’s logs, providing valuable insights into potential security issues, system performance, and operational events. Regular use of Event Viewer can help you detect anomalies and respond to threats in a timely manner.
Practical Tips for Using Windows Event Viewer:
- Know the Key Log Categories: Familiarize yourself with the main categories in Event Viewer:
- Application Logs: Monitor errors and alerts from individual applications installed on your system.
- Security Logs: Track successful and failed login attempts, changes to user accounts, and other security-related events.
- System Logs: Keep an eye on issues related to system hardware and core services.
- Create Custom Views: Use Event Viewer’s Custom View feature to filter logs based on specific criteria, such as event ID, log level (information, warning, error), or the source of the event. This helps you focus on the most relevant data quickly.
- Set Up Real-Time Alerts: Configure alerts for high-priority events, such as multiple failed login attempts or unauthorized changes to system files. Real-time alerts can help you respond immediately to potential security breaches.
- Use Event IDs for Troubleshooting: Each event in the log is assigned an ID that helps identify the nature of the issue. Understanding these Event IDs allows you to troubleshoot problems more efficiently and recognize recurring security threats.
- Regular Log Review: Establish a routine schedule for reviewing logs, focusing on unusual patterns that might indicate a security incident or system malfunction.
Best Practice: Combine the use of Event Viewer with third-party security tools for a layered defense strategy that increases the chances of catching suspicious activities early.
SIEM Systems
Tools like Splunk or Graylog can provide centralized logging and real-time threat analysis. Security Information and Event Management (SIEM) systems are essential for organizations that require robust monitoring, real-time analysis, and a centralized way to manage logs from various sources. SIEM tools not only collect and analyze data but also help detect potential threats before they escalate into serious issues.
Practical Tips for Implementing SIEM Systems:
- Centralize Log Collection: Use SIEM tools like Splunk or Graylog to aggregate logs from multiple sources, including servers, firewalls, applications, and network devices. This centralized view simplifies threat detection and incident response.
- Create Actionable Dashboards: Set up dashboards in your SIEM system to display key metrics and alerts in real-time. Customize these dashboards to prioritize high-severity events that require immediate attention.
- Automate Threat Detection: Utilize the machine learning capabilities in SIEM systems to identify abnormal patterns of behavior. Automated threat detection reduces the time it takes to recognize and respond to attacks.
- Correlate Events Across Systems: SIEM tools can correlate data from various sources to uncover hidden patterns or relationships between seemingly unrelated events. This insight is crucial in identifying sophisticated threats that might go unnoticed in isolated logs.
- Set Up Incident Response Protocols: Integrate your SIEM system with your organization’s incident response plan. When a threat is detected, the SIEM tool should trigger automated workflows that guide your team through the necessary steps to mitigate the risk.
Tools to Consider: Splunk and Graylog are among the most popular SIEM solutions. Splunk offers advanced analytics and customizable dashboards, while Graylog provides a user-friendly, open-source platform for efficient log management.
Best Practice: Regularly update your SIEM rules and machine learning algorithms to adapt to emerging threats. Stay informed about the latest threat vectors to ensure your SIEM system remains effective against evolving cyber attacks.
ThreatLocker’s detailed auditing capabilities offer an in-depth look at application behavior and network traffic, making it easier to spot irregularities and respond quickly.
8. Backup and Disaster Recovery
No matter how strong your defenses are, breaches can still happen. Having a solid backup and recovery strategy ensures that you can quickly restore operations with minimal downtime.
- Regular Backups: Use Windows Backup and Restore to create routine backups of critical data.
- Offsite Storage: Store backups in secure offsite locations to protect against local threats like ransomware.
Anytime Computer Services specializes in creating comprehensive backup solutions to safeguard your business data. For more information about our IT support packages and disaster recovery plans, visit here.
Conclusion: Building a Stronger Defense with Anytime Computer Services and ThreatLocker

Hardening your Windows environment requires a multi-layered approach that combines the best security practices with the right tools. ThreatLocker offers a comprehensive suite of solutions to secure applications, monitor activities, and enforce Zero-Trust principles.
If you need assistance setting up any of these security measures, Anytime Computer Services is your go-to partner for all things IT. From initial setup to ongoing maintenance and support, we help you protect your systems from today’s most advanced threats. Reach out for a consultation to discuss how we can tailor our services to meet your specific needs.
Ready to Secure Your Windows Environment?
Don’t wait until it’s too late. Strengthen your Windows systems today with professional help from Anytime Computer Services. Visit our service page to explore our IT support options or contact us directly at hello@anytimecomputerservice.com to get started.